Showing posts with label House. Show all posts

Friday, August 14, 2015

Pinterest....ing- Clip Boards


Getting our home to look the way I want it to is a work in progress.  It takes time and money, and if I had either one in abundance I think it might be done already.  But alas, I have constraints (like most people) on both.  

Pinterest is such a life saver, whenever I need some inspiration, I do a little search on pinterest, and my creative juices start to flow.    This time, I needed some inspiration for our game room upstairs...well the hallway around the game room.  Off I went to pinterest and found this:


Super Cute.  She used her clipboards for beautiful prints to match her kitchen, I'm thinking a little more playful, and maybe as time goes on, a place to display the art my kids create.


We cut the wood, sanded it, and I stained it with PolyShades...love that stuff.  It's a stain and poly in one.  I only did one coat, because well, I can't imagine it needs the protections of more coats, and I didn't want them any darker.


Attaching the hardware.  This was really difficult.  ha ha.. Just kidding.  Unlike the cute blogger before me, I did attach the clips with screws.  I can't help it.  The idea of glueing them made me imagine re-glueing them (kids are not known to be gentle), and I'm not into that.  

This is how it's done.  Measure where you want the clips ( I did 1 1/4" from the top, and 3 1/2" from each side).  Then using the screws pictured above, I put the screw through the back hole of the clip, and used my power drill (kinda sideways), and drilled it in as far as I could.  Then, I used my actual hands, and a manual screw driver, and turned the last few turns.  I had to use a skinny screw driver to fit through the top hole, but luckily we have every type of tool known to man (just kidding, my husband wants way more tools than we have).  

This is the finished product.  They are pretty cute.  I can't wait to get them up, and when I do, for sure I'll show you.  (And you can guarantee I'll put the up with command strips...those things rock).


Thursday, January 8, 2015

Sewing Room Update

After moving into our new home a little over a year ago, I was thrilled to have my sewing room.  It's perfect for me.  It's downstairs, the window looks into the backyard, and the door opens to the family room and the kitchen.  Perfect for keeping an eye on all my little people, perfect for being able to work in the small bits of time I get each day.  But let's be honest.  Moving into a house, for me, left me with limited funds to make my sewing room amazing.  Quite honestly, I need a little time in a place to see how I like to function. 

Setting up the old sewing room was still fun.  It wasn't pretty though, and it was mildly functional, and it wasn't that organized.  I tried though.  And I was still grateful to just have a spot to hang my hat and make a few things.

Here are the before shots. The closet was a mess.  All the left over portions were in there.  My absolute funniest part was the bottom picture on the right.  That wall was a rag tag collection of shelving I found whenever I needed a little more storage.  It wasn't pretty.  It wasn't strong.  It wasn't great.  But it was mine.  But I was aching for something more.
I spent months planning this thing.  I searched high and low in IKEA for the right fit.  I planned a whole room.  And then they changed their product offering.  Big frowny face. Back to the drawing board. Still Ikea, but it took more time, and a little more money to make my sewing room what I wanted.  Billy bookshelves have become a big friend of mine over the last year.  They are cheap, but they are awesome. I also used the new Kallax (but wished so hard for the whole Expedit series they used to have).  And for the walls, I got both versions of the Varde shelf. And then a tons of odds and ends, chair cushions, containers, containers, and more containers. 

News flash.  I got all the stuff for the sewing room a week before Thanksgiving.  And I didn't get it put together until the day after Christmas.  That took way longer than I desired. I wanted to organize it perfectly. I wanted to be able to find things easily.  Have it be intuitive as I was creating things.  That took time.

Here's the semi-finished product.  I still want to "decorate" a little.  Pretty it up a bit.  But, this is the main idea.  The biggest change still needing to be done is the desk top.  My hubby is going to make that, I'll update y'all when that happens.


The closet was in desperate need of an overhaul.  I used left over items I had from our old house.  I love the gift bag storage, hopefully things will be a little easier to find now.  The tissue storage is pretty fun too, another ikea item I had from the old house, now the tissue is tucked away, out of sight, but organized.


Here's one of the Varde shelves from Ikea.  This displays and holds my ribbons, and trims, needles, pens, buttons, etc.  It's close to my sewing machine, so I can easily use these items.


Who doesn't love a wall of shelves.  I do.  I do.  This was an interesting transformation.  We bought three more shelves, 2 regular size, 1 15" wide.  As I was installing them, and organizing all my goods, I realized they just didn't have enough shelves to best use the space.  Lightbulb moment!!!!! I had a ton of Billy shelves left over from our "built in" bookshelves project we did earlier.  I gathered them up, and low and behold, Billy has changed their shelving hardware.  After a little wait, we got to go to IKEA again (2 hour drive away), got some more hardware, and I used the drill a bit, and now the shelves all fit.  I have everything I need.  Phew.


Do you remember the most horrible wall?  A mess of random shelving.  This is it now.  I love it.  It's clean.  Useful.  Love.  And when my sweetheart puts the table top on it, it will look finished, and be great.  The plan is that my little ones can work in here with me.  That there will be room on each side of the table, for two to work.  The hope is bonding and accomplishment can be done at the same time.  The shelving above the table still needs a little work too.  I need to decide where I want to attach some "goodies" to the wall.  Drilling things into the wall, always inspires me to pause for a little bit.


I am loving my new space.  It feels bigger.  It's easier to be in here, and it's easier to work.  I'm loving it.  Maybe IKEA can work some magic in your sewing room too.

Tuesday, June 10, 2014

Let's Paint....Kids rooms

For those of you who aren't invested in my daily life, this is my daily life during the school year:

Get up. Work out. Drive. Clean up.  Prepare all things for living with a family of 6. Preschool driving. Then spend 2 hours driving to pick up kids from various schools.  Then piano lessons, gymnastics, basketball practice, etc..  So yeah, I spend my days in a car.  Not the most productive time, and definitely hard to get time lumped together to get stuff done.

Let's be really honest here.  When school is in, I'm lucky to get an hour of free time.  Ever.  I know, I must be doing something wrong (like having my kids in all different schools on different sides of town).  

Anyway, schools out.  And you know what that meant for me?  Time.  Time free from driving.  Time, with hours - all in a row- to work.  I LOVE being productive.  It's my very favorite.  So, in two days, I painted 4 of my kids rooms.  Was it slightly insane?  yes.  Did I have help from my cute hubby.  Not so much, except for the help of him making dinner and caring for the sweet cherubs while I ignored them.

Here's how it started:

This is Lizzy's room, half way through.  All the rooms were painted white.  When we moved in, we painted the rest of the house.  It was hard work then.  I wanted to paint the kids rooms, but with everything we were doing, it just wasn't physically possible.  And then...time ate me up.  Lizzy wanted her room green and blue.  I worked hard to try to influence her on how she wanted it painted.  To no avail, she wanted green, then a white stripe, and blue on top.

We started with taping around the room, using a level as our line to follow.  Painted green on the bottom and then blue.  The kids actually "helped" a lot with this room.


 Here is the finished product.  Well, here's the paint.  I really want to decorate at some point.  I do have a vision.  But, I need more money an some time to pull it off.  But, at least this room is painted, and my Lizard feels like it is her special place.


Mitchell's Room:

The theme of his room is going to be travel.  His colors of his room are blue and orange (yep all the kids have the same blue in their rooms, with their own accent color).  

Here's Before:
yes, a little furniture heavy.  I would love to get a desk thats a little smaller to fit the room better, but this one is free.  so...yep, that's what he gets for now.


Mitchell After


Madeline's Room:
She's a full fledged teenager now.  She has a vision of what she wants her room to be, and it's flipping cute.  But first, all the walls are blue, with a red accent.


Madeline's Room after

She also made one chevron wall.  It is the window wall, which makes it terribly hard to photograph.  Just saying.  I found a fun tutorial about how to make the chevron.  It was pretty easy.  Just make a graph on the wall.  We divided the wall vertically into 4, then horizontally divided it into 6.  Drew those lines.  And then connected the intersecting points, by drawing a line from one point, to the other lines point one line up...does that make sense?  Anyway,  pretty awesome.  
Best part.  My two oldest worked on the grid part all day while I painted the other rooms.  Super helpful.

Noah's Room:
Pretty basic before shot.  Bed, clothes, and toys...there's like three in there.


He wanted to help.  I had to continually remind myself of our family theme during painting...
the purpose of the task is to strengthen the relationship......
To make his whale wall this is what had to be done:
1. Paint the whole wall base color (our room, light blue)
2. Make wave template out of contact paper, and  place on the wall.  Make the line straight using a level or laser level.  Remember, to use the negative of the wave shape.


See...those are pretty cute waves...just cut them out free hand.

3.  Using my silhouette, I cut out a boat, and a whale with vinyl.  

The whale tale had to be navy blue, but the whale body had to be light blue.  That meant, there was some waiting time in between painting time.


4.  Enjoy your sweet kid who loves there room, and swims in the ocean there....


Friday, May 9, 2014

OUR Ana White lockers


When we moved into this house, I was pretty excited.  We finally had enough space in the garage to have our own lockers.  With 6 people in the house, it is hard to keep everyone's shoes, jackets, backpacks, and other goodies all together, and off the kitchen floor.  I'm a big fan of organization.  I love PERFECTLY clean homes.  But, magically, one out of six people wanting a clean space, does not make a clean space.  So we built our lockers to keep everyone's stuff out of my sacred zone.

We used the plans found here, Ana White Lockers, and then adjusted them to our own needs.  Quite honestly, I have no idea about our measurements, or how they were built.  I went away for a few days, and my hubby pulled it together while I was gone (for my birthday).  Love that guy.  Anyway, I came home and this is what I found.  Also, because this is in our garage I went the "sturdy and cheap" method with our containers. Of course, I would love to have everything in beautiful wood baskets, etc... but it's not economically feasible, and let's be honest, kids need plastic sometimes.  And wouldn't you know it, the hooks, were cheaper when bought already on a wood board.  Who knew?


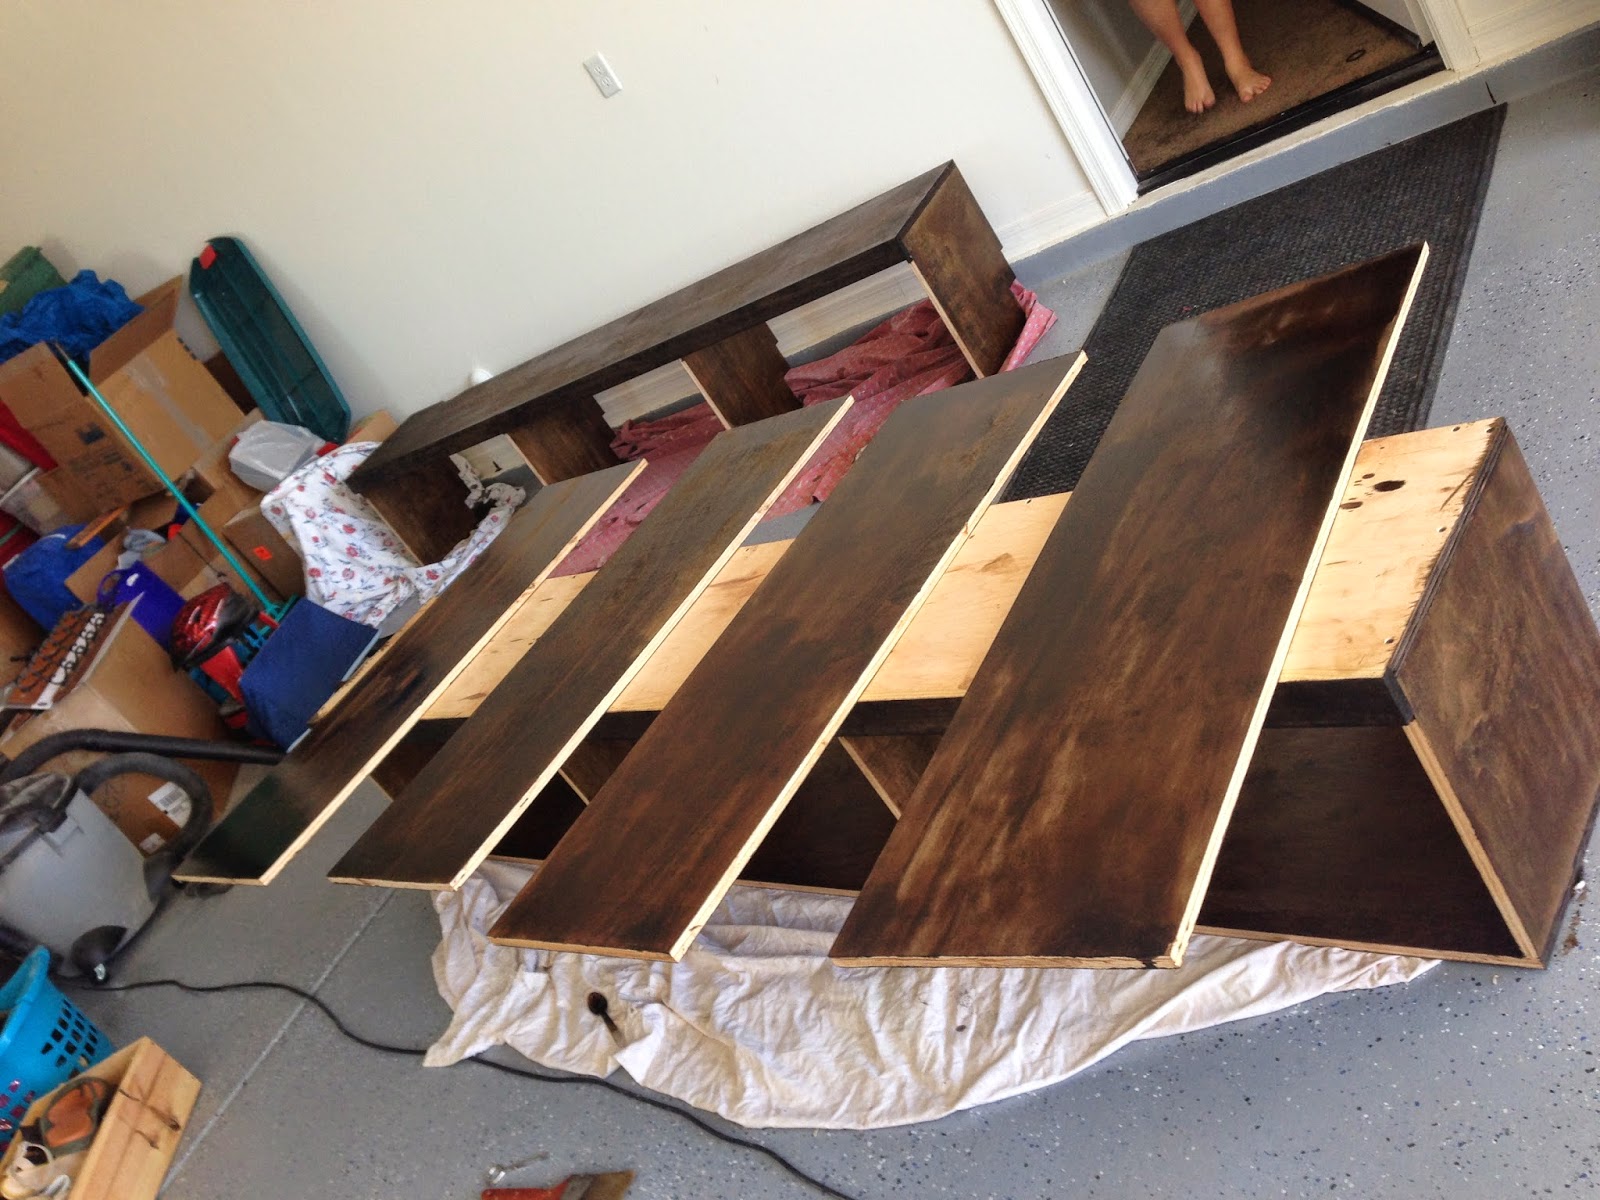
But this is only half.  There are six of us, and we need all the help we can get.  Now that I was home, the job of finishing it was up to me.  I have to be honest, after moving in, I was tired.  SUPER TIRED.  We painted our whole house.  Okay, not true, we left out the bathrooms, and the kids bedrooms, but it was a lot of painting.  And, I sorta died.  In comes, LAZINESS.  I'm a fan of it.  Plus, these lockers are in the garage.  This is not in the house.  We're looking for good.  Not my best work.  I mean come on. So, I used the polyshades.  Here's my review of that...it's not as easy as one might think.  It was hard to get it to go on evenly, and as much as I wanted it to be one coat, it for sure needed two.   I kinda cried a little inside when my hubby saw the lockers after one coat and seemed disappointed.  So, I vowed for the next set of lockers I would find a matching stain and and just stain it and poly separately.


Here's the polyshades going on.  I like it, but it is a little streaky, and hard to control.  Nothing like regular stain.  Plus, it covers up a lot of the grain of the wood.  Even though all of that is true, I still found a lot of beauty in it.  It looked rustic to me, and had character.  (but I was alone in my principles there).


So, for the next batch, I got stain, and went to town.  I'll be honest.  It was easier to stain this way,  just brush on and rub off.  Kinda easy.  I love staining.


Here's the difference between the finishing methods.  Honestly, I love the wood grain coming through with just the stain, but I love the warmth and character of the polyshades.  I sincerely thought I would just throw on some poly after it was stained, and call it good.  Uh.. no.  It took just as much effort to put the clear poly on as it was to put on the polyshades.  After all was said and done, I wished I had just stuck with the polyshades.  But, it was a great learning experience.


Thursday, April 10, 2014

Our Little Office Workstation


Wait?  You're thinking, that's not an office or a workstation.  That's a kitchen.

Okay, so yes.  When we were building this house,  I knew we wanted a workstation in the kitchen.  In our old house we had a computer in the kitchen, and it changed my world.  The office we had loved before became obsolete, and all our needs were being taken care of in our kitchen.  The only problem was in our new house the little nook where this "office" would be was WAY bigger.  Like three times bigger.  That tiny desk we bought to fit in our old kitchen, would definitely look super out of place in our new one.

So, I got thinking.  And I became very close friends with the internet.  I was browsing on ikea, and I saw a little workstation.  That started my wheels turning.  We could make a workstation there.  It could be more than one desk. Maybe two people could sit there.  So we measured, we thought, and then I got crazy.  I realized there could be three workstation spots.  Are you kidding me?  All my school age kids could have a spot.  Weird.  Wonderful.  Wow.

I knew I wanted to use the ALEX drawers as the base of our desk.  In all honesty, these are good, but if I had my preference I would get something with little drawers and some hanging files.  I miss that a bit. But, the prices of the ALEX couldn't be beat.  And if you know me at all, you'll know that price is a big deal to me.  So, now for the top.

This was hard.  I tried to find anything that could be a countertop for a good price.  I found butcher block counters...a great price too.  Except, darn it, the shipping was as much as the counter.  NOPE.  granite?  I needed 12 ft.  Yes  12.  That's a little crazy, and a little expensive.  That also meant that prefab anything was out.  I found a solution of using 2 x 12's.  After looking through many of those, we realized that none were straight enough.

Finally, we came to the conclusion we could use plywood.  You know, "fancy" ply.  We used maple, cut the length in half so it was 24" wide.  For the 2 side pieces we used the remaining wood, we turned it so the grain was going the opposite direction (to give it interest, and make it look intentional), and cut those pieces to give us the length we needed, and of course kept the width at 24".  Using a friends biscuit joiner, we joined the pieces, and then added some finish wood around the 3 edges that would be seen.  The back was going up against the wall, I felt adding the finish wood there was overkill.

****Funny side not my husband will love for everyone to know.  He didn't calculate correctly, and the desk was 1/4" to big to fit in the space. Luckily, he knows how to use his tools.  He cut off a little stained it again, and it is perfect.

Next we stained it.  The color of our kitchen is kinda a gray/brown color, and white cabinets.  So, I stained this with all gray stain.  And then lightly stained it with brown over top.  It turned out just like I wanted it to.  We used a water based poly, and can I say, I won't ever do that again.  Yes, it washed out like a dream, but it totally created bubbles that is not what I wanted.  But, that's what these projects are about....learning.. right?  Well, that's what I think.


And here's the finished product.  Three workstations.  All the computers in our house in one location.  A space to work without a computer, and 2 other spaces with computers to get those papers done, and all that other stuff kids need to do. 

 I honestly love this.  Someday I might even decorate it to make it look "cute."