Thursday, April 30, 2015

Creative Eye Thursday (almost)- Teach Me to Appliqué by Pat Sloan

Martingale, 2014; used by permission. Photos by Brent Kane. All rights reserved
When I started reading this book I was impressed.  Pat Sloan has done an incredible job explaining appliqué,  both beginning and experienced quilters will get lots of information from her book.  I love that she covers not only appliqué, but threads, tools, etc.  There's a lot of tips in here that are super helpful.  This book's main purpose is to teach the applique technique, but Pat has added a few projects to teach the principle, and they are all very cute.  

I just wish I had paid closer attention to this page.


Martingale, 2014; used by permission. Photos by Brent Kane. All rights reserved
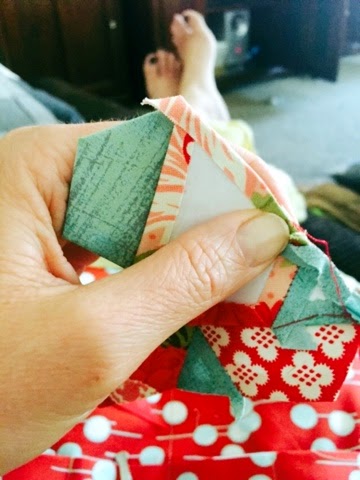
You know, I am not a stranger to fusible web.  I have done it a number of times.  No, I don't do it a ton.  Because, well, I am a piecer.  I love piecing.  I digress.  I spent last night and this morning, picking fabrics.  Tracing shapes. Cutting.  Cutting.  Cutting.  Ironing.

And half way through this project, my brain actually came to play.  I looked at what I was doing, and realized that I did it all wrong.  JOY.  Well, maybe not joy.  But, at least it was funny.  I was ironing the fusible on the right side, instead of the wrong side.  Argh.    So, I went about the task, or repairing my mistakes.  Until...  I realized, I have a daughter who has a birthday tomorrow.  I don't have time to find all new fabric, and start from scratch.  Well, no time today.

Today, you get to see that quilters make mistakes.  That we shouldn't really mindlessly go about our tasks.  Or maybe, it's just me.  Either way, I actually really enjoyed this book.  I love trying all these different methods in quilting.  And, I was looking forward to trying this appliqué method.   At least now I know the process, and when I come upon another appliqué project, I can totally test it out.

 Martingale, 2014; used by permission. Photos by Brent Kane. All rights reserved

Here's the project, below, that I had hoped to make.  But, to switch mine up, the background was red, instead of white.  The flowers were blue, and the middle thing, I had planned for a white/red floral.  I was trying to push it a little, and be a little different.  ha ha.  Maybe I should have just used the wrong side of the fabric, that would have been VERY different.

Martingale, 2014; used by permission. Photos by Brent Kane. All rights reserved
Check out Pat Sloan's book today, you'll love it.


Tuesday, April 28, 2015

17…wow

17 years ago today, I married my very best friend.  It's a little fun, because we got married on a Tuesday (maybe a little strange), and today is Tuesday.  It's come full circle. 

On our very first anniversary, I had just graduated from college, and I had mono, and we were poor.  Since I couldn't afford a present, I made him a little collage of our first year.  It wasn't much, but it started our tradition.  Now, I don't know how we got to 17 years.  Time has flown.  So much has happened, at yet I still feel like a teenager in so many ways.

I'm so grateful for the family we have built.  For the 17 years we have had together.  He is one of the very best men I have ever known.  He is selfless, kind, loving, humble, forgiving, hard working,  understanding, and teachable. I love him.


Want to start your own anniversary collage tradition?  Go to my previous post, here, to learn all about it.  Then download the template.  It's one of our favorite things in our house.

Happy Anniversary!

Friday, April 24, 2015

Whole Grain Artisan Bread (in 5 minutes a day) and Blendtec

I'm a big fan of Artisan Bread in 5 minutes a Day.  I wanted to try out a healthier option, by using my whole grains.  I do have a grinder.  But to be honest, it is not the easiest thing.  It takes a bit of time and sounds like an airplane is in my house.  


But, I do have a Blendtec blender.  Hot dog, I love that thing.  So, I got a scoop of 7 grain mix, put it in the blender, put it on level 9, and let it go.  What do you think?

Slightly unconventional, but I use the top of my cake holder to mix the bread dough.  It's the only thing I have big enough to do a double batch, and still have a lid for the fridge (yep, I turn it upside down).
Add the salt, yeast, and water..and let it proof for a bit.
3 cups lukewarm water (you can use cold water, but it will take the dough longer to rise. Just don’t use hot water or you may kill the yeast) 

1 tablespoon granulated yeast ( you can use any kind of yeast including: instant, “quick,” rapid rise, bread machine, active dry, or fresh cake yeast*. We’ve always tested with Red Star Yeast and they have a new premium product called PLATINUM, which has worked beautifully in our recipes. You can also decrease the amount of yeast in the recipe by following the directions here. Or you can bake with a sour dough starter, see instructions here.)
*If you use cake yeast you will need 1.3 ounces.
1 to 1 1/2 tablespoons Morton Kosher Sal(adjust to suit your taste or eliminate it all together. Find more information here)
6 1/2 cups (2-pounds) all-purpose flour.  
I added 4 cups of multigrain flour and then 9 cups of all-purpose flour (remember now...I double the recipe).  


Then mixing just to incorporate all the ingredients. 


Here it is.  Mixed.  It took about 1 minute to mix it to this consistency.  The point here is to just get it all wet.  Then let time take over to make your dough awesome.  I usually start my dough in the morning, and then bake it in the later afternoon.


Just cover and let it rest, while you go about your business.  No big deal.  I know the creators of this recipe make a bunch of dough, and store it in their fridge to use throughout the next couple weeks.  But me?  I just bake it all up the same day.  My family eats about 2 loaves, and then I usually find a few friends to share the rest of the loaves with.


Form loaves, about 1 lb each.  Let rest for about 40-60 minutes.  The longer they rest, the bigger the bubbles in the loaf.  Also, they should spread out, not so much rise up.

Preheat the oven to 450 degrees with a Baking Stone* on the center rack, with a metal broiler tray on the bottom (never use a glass vessel for this or it will shatter), which will be used to produce steam. (The tray needs to be at least 4 or 5 inches away from your stone to prevent it from cracking.)

When ready to bake, place on the stone (I use a pizza peel to put it in the oven-using corn meal on the bottom), and bake for 30-35 minutes until the loaf is a deep golden color.  


Enjoy!


Thursday, April 23, 2015

Creative Eye Thursday -The New Hexagon by Katja Marek


Picking this book to review was a bit of a challenge.  The blocks are fun.  Everything is perfect, but let's be honest, hand piecing?  I have never done hand piecing before.  And as much as I would like to say I am a patient woman, let's be honest, that's not by best trait.

When Mark Lipinski came out with his slow stitching movement, I was intrigued, and I back him whole heartedly, and I love the idea.  But, that's just not where I am right now.  And that's okay.  (My stitching still seems pretty slow with the 20 minutes I get to work on stuff here and there). Here are some of the goodies in this book.


If you wanted to join the slow stitching movement, this is totally the book for you.  The funniest part of this for me was picking the block to make, it took a minute.  I finally picked the block I like the best, and then I looked at the name.  Sarah.  Seriously?  Why didn't I just look at all the names of the blocks, and then pick my name.  That could have saved me some time.    But, in the end it seemed like it was meant to be...if making a block can be meant to be.

It took about 1 hour to prep the block. Then the next day, I really had very little time.  I had appointments all morning, and watching kids, and driving carpool.  The nice thing about sewing by hand, is that I could take the block with me wherever I went.  I started at the park.  During my 5 year olds learning time I threw in a couple stitches, and then couple more stitches during the daily drive.


Here's the finished block.  I loved as I pieced it together, that my 5 year old genuinely and seriously said: "That is a really cute block."  That's a pretty great compliment, even if I say so myself.


Wednesday, April 22, 2015

Quiltmaker's 100 Blocks Blog Tour

It's coming up...are you excited?  
On the edge of your seats? 
My block is in this next issue, and I'm pretty excited to show you what's up.


Tuesday, April 21, 2015

Broncos Star Inspiration-Quiltmakers 100 Blocks


Last fall I spent quite a bit of time around blue and orange.  Like all the time.  Being a cheer coach, as well as the momma for a pretty awesome football player, meant I got to be bathed in blue and orange pretty much all the time.


It's amazing how being immersed in a sport, can change your quilting.  Never before had blue and orange caught my eye.  But, I started liking it (even though our NFL team is decidedly not the broncos).


When I knew I needed to make a block for Quiltmaker's 100 Blocks, I had to pay homage to my blue and orange team.  How could I resist?

Here's a sneak peak of my quilt block.  Orange and Blue... it's the start of a beautiful friendship.

Thursday, April 16, 2015

Creative Eye Thursday - Fabulously Fast Quilts by Amy Smart

Martingale, 2014; used by permission. Photos by Brent Kane. All rights reserved

If you are a new quilter, or a seasoned quilter who is looking for something quick and beautiful to put together in a jiffy, this book is for you.  Every quilt is adorable.  Seriously so cute.  I know there are times for me, I just need to make a quilt for a kid, a loved one, etc...in a short amount of time {like yesterday}. This quilt book is for those times, when you need a super cute quilt in a hurry.  If you are new to quilting, this book will teach you a ton of the basics in quilting, and you will be able to make some awesome quilts (which is sometimes difficult when you are new).

Here are some of the goodies in the book.
Martingale, 2014; used by permission. Photos by Brent Kane. All rights reserved

Fun.  Simple.  Perfect.  

As I was looking to see which quilt block I would make, I came across this quilt.


I love this quilt.  It really is just a variation on a pinwheel block, a block I tend to love.  I also enjoy that the instructions were clear and fun to follow.  It used PRECUTS, which I am a big fan of.  Less cutting for me = a happier me.  I also enjoy the fast piecing and cutting methods.  Totally my style.

I pulled out my STACK of precuts and picked out a few choice squares, cut a few white and gray squares and rectangle.  

Lower right hand corner = my favorite way of sewing. Sew, slice, and make life easy.  YES!

After a day of sewing, this is what I pulled together.  Making more than one block meant I could make this into a little girls baby quilt.  Lately, because its the  7th anniversary of our stay in the hospital with Lizzy, I have been having feelings like I should make all these quilt blocks into quilts for Project Linus.  Showing up to that hospital and being greeted with a handmade quilt, well, it touched my heart in a way I couldn't have anticipated.  I have made a few quilts for Project Linus, but maybe a few needs to turn into a few hundred (I digress a bit...).  Anyway......


So here's my little quilt...with my little quilt blocks.  What colors would you choose?  I pondered going way back in time, and doing some nice reds and browns....but the baby quilt part made me use pinks and grays.  MADE ME.  ha ha.

Have a super day.  And get some sewing done.  You know you want to.


Wednesday, April 15, 2015

Quiltmaker's Blog Tour


You know you want to check out my bock in Quiltmaker's 100 Blocks.  My block introduction day is May 7....are you excited?  Mark your calendars.  Let's do this thing.

Tuesday, April 14, 2015

Homemade Pizza Heaven - Pizza Limone at Home


The other day I was dying.  Dying for some amazing pizza.  Last time I was home I went to a little restaurant called, Pizza Limone.  I loved it.  Such great pizza, and totally a fresh concept for pizza.  I mean lemon on pizza, that's new, and amazing (for those of us that love lemons)!

My hubby got a fabulous pizza oven from Costco, and on sale ($99).  It's the best.  Anyway, I pulled together all my recipes to make the best faux Pizza Limone I could.  For honest, I LOVED IT.   Here'

3 1/4 cups lukewarm water
1/4 cup olive oil
1 tablespoon Yeast
1 to 1 1/2 tablespoons Kosher salt
2 tablespoons sugar
7 1/2 cups (scoop and sweep) unbleached all-purpose flour

To make the dough: Use our dump and stir method of mixing the dough in a 5-quart Container with Lid, using a Danish Dough Whisk or wooden spoon. Then cover the container, not airtight and let it rest for about 2 hours on the counter. The dough can then be used right away, but it is much easier to handle once it has been thoroughly chilled. The dough can be stored in the refrigerator for 2 weeks!
To make the pizza:
Preheat your oven to the highest setting, which will be 500 to 550°F, with a pizza stone in the bottom 1/3 of the oven. Depending on the thickness of your stone this can take between 20 and 40 minutes.

Pull out an 8-ounce piece of dough from your bucket and quickly form it into a ball, no more than 30 seconds of work. Let it sit on the counter while you gather your toppings.

Roll the ball out into a 1/8-inch-thick round. If the ball is resisting just let it sit for about 5 minutes and it will relax and allow you to work with it.

Sprinkle a Pizza Peel with flour. Spread the tomato over the dough.

Place the chunks of cheese over the sauce and drizzle with the olive oil.


Check for doneness in about 8 to 10 minutes, turn the pizza around if it seems to be browning on one side more than the other. It may take up to 5 more minutes.

Let the pizza cool slightly, so the cheese can set a little before cutting with a Pizza Cutter. This is best done on a cooling rack if you want to keep a crisp bottom crust.
s what I found.  Try it out and tell me what you think.


First of all pre-heat the oven and pizza stone to 500 or your oven max (usually 400-450) 

Limone Pizza:
7 oz dough-proof properly to allow air into dough and stretch to 10' round on floured pizza peel 
½ oz olive oil drizzled evenly on top of dough 
4 cheeses 
3 oz whole milk mozzarella
¼ oz pecorino 
½ oz fresh mozzarella 
--spread cheeses evenly over olive oil 
--top with 
1 oz red onions, thinly sliced
¼ garlic clove, thinly sliced
5-7 lemons, thinly sliced
¼ oz parmigiano reggiano grated 
light drizzle of olive oil 
slide pizza on preheated pizza stone and bake for 5-10 minutes or until crust is dark brown

For more information about Pizzeria Limone 


Some Variations:

One of the pizza's featured prosciutto and black berries and a red sauce, with all the yummy cheeses.  My husband preferred that one, to the lemon, but I definitely LOVED the lemon most.  It's just your preference.  For some fun ideas, check out pizza limone menu, and try what fits your fancy.  

We also tried some dessert pizza's. Oh my word.  I found a great little pizza. 

Clementine, Strawberry, Chocolate Dessert Pizza
Butter
Brown Sugar
Clementine
Sliced Strawberries
Melted Chocolate

Spread melted butter over regular pizza crust recipe.  Sprinkle brown sugar over butter (as desired).  Layer clementine slices and strawberries.  Bake in pizza oven until done (5-9 minutes depending on oven).  Drizzle chocolate on pizza.  Enjoy!!!  

So YUMMY!


Thursday, April 9, 2015

Creative Eye Thursday- Sweet and Simple Sewing

Sweet and Simple Sewing

Quilts and Sewing Projects to Give - or Keep

by Jessie Jung, Carrie Jung, and Lauren Jung

Martingale, 2014; used by permission. Photos by Brent Kane. All rights reserved

Looking through this book by Moda's fabric designers, you will love all the variety of projects they offer.  There are quilts (love), and pin cushions, bags, potholders, cozy's, and more.  If you are looking for something fun and quick to put together, or a fun quilt, you will find it here.

Check out some of the fun goodies you can see in this book:
Martingale, 2014; used by permission. Photos by Brent Kane. All rights reserved

I found this quilt below, and I knew I wanted to try my own thing with one of it's blocks.

Martingale, 2014; used by permission. Photos by Brent Kane. All rights reserved


I actually love the fabric choices of the quilt above.  But, for the intent of showing something different on this blog, I went a different direction.  In each of the blocks of the above quilt, the colors are more muted and there is some blending going on.  I think it's lovely.  But, I wanted to try something a little different.  

Grabbing a little of my Kaffe Fassett fabric, I got to work.  There are a fair amount of pieces of this block.  Which is actually fun.  It was interesting to watch this all come together.  I definitely wanted a big impact on this quilt block.  No blending.  I also wanted to make the frame around the star, the "interest" in the block {instead of the star fabric}.  Here is it is.  What do you think?


Monday, April 6, 2015

Conference Cinnamon Rolls - World's Best? YES!!

I considered naming these, Holy Rollers, or maybe Celestial Cinnamon Rolls but I didn't know if the world of blog readers would appreciate such a silly title. 


Each Conference, my family counts on me to make these little joys.  We have our traditions when it comes to Conference.  We spend the day in our lounge clothes, we have amazing breakfasts, we take walks between sessions, and say shhhhhh.... a lot.  As my little Noah says, "we should have conference every week, so our whole family can always be together."  And that is the joy of Conference, being together, all day, and enjoying listening to the word of God.  Nothing could be better.

Well, maybe, these cinnamon rolls are pretty close to heaven. I got this recipe a few years ago from my dear sister, and have been making them since.  I love that these cinnamon rolls are rich, moist, and decadent.  Since they are such a delight to me, I thought I should share them with the masses.

It starts with this:

Conference Cinnamon Rolls

ROLLS
1 1/4 oz dry yeast
1 tsp. Salt
1 cup warm milk
2 eggs
1/2 c. granulated sugar
4 cups all purpose flour
1/3 cup butter, melted

Dissolve yeast in warm milk in large bowl.  Add sugar, butter, salt, eggs, and flour and mix well. Knead dough into large ball using your hands dusted with flour.  Put in bowl, cover, let rise in a warm place about 1 hour, or until dough has doubled in size. Roll dough onto lightly floured surface, flat until it is approximately 21 inches long and 16inches wide, 1/4” thick.  

**Note: I like to make the dough the night before, and put it in the fridge. It's a sticky dough, and much easier to work with when it's cold.

Preheat oven to 400 degrees.

FILLING

1 cup packed brown sugar
1/3 cup butter, softened
2 1/2 tbs cinnamon

For filling, combine brown sugar and cinnamon.  Spread softened butter evenly over surface of dough, and sprinkle cinnamon and sugar evenly over surface.  Working carefully from top, roll dough down to bottom edge.  Cut rolled dough into 1 3/4” slices and place 6 at a time evenly spaced in greased baking pan.  Bake 10  minutes, or light brown on top.  


**Another Note: Maybe I cut my cinnamon rolls a tad bigger than the recipe writer, my cinnamon rolls always take about 15 minutes to bake.  I also like them a little light brown on top and bottom.


While rolls cook, combine icing.  Beat well with an electric mixer until fluffy. When rolls cool slightly, coat each generously with icing.    Makes 12 rolls

ICING

1 stick Butter, softened
1/4 cup  cream cheese
1/2 tsp vanilla 
1 1/2 c. powdered sugar
1/8 tsp salt


There you have it.  The world's most perfect cinnamon roll.  Heaven is about to enter your mouth.  
Enjoy!